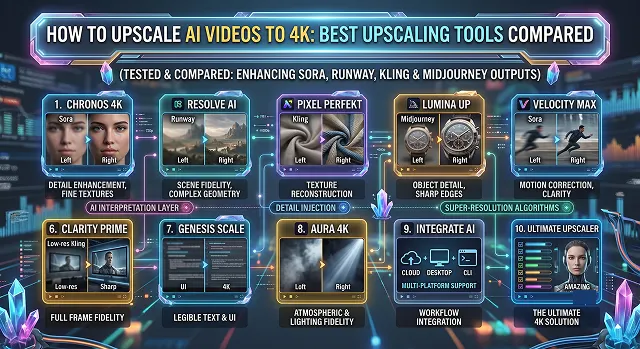
Anyone who has produced an amazing 720p or 1080p video clip using contemporary AI video generators such as Sora, Runway, Kling, or Midjourney knows how annoyingly true this is – AI videos tend to look somewhat blurry, lack textures and fail at higher resolutions.
In order to make your AI video clips ready for clients or YouTube, or cinematic in quality, you must upscale them to 4K. Ordinary upscaling merely stretches the pixels, resulting in blur. But with AI upscaling, a whole new detail level is constructed using neural nets.
Why You Must Upscale AI Videos to 4K
Before selecting a specific tool, one must first gain an understanding of why a 4K upscale is virtually necessary for contemporary content creators:
- The "AI Softness" Cure: AI video renders have inherent hyper-smoothness, with somewhat "waxy" textures. Intelligent upscaling allows the reintroduction of natural grain and micro-textures.
- Timeline Matching: When combining AI b-roll footage and 4K footage in a timecode, the lack of upscaling on 720p material makes it look low resolution.
- Beating Social Media Compression: Every video platform like YouTube, TikTok or Instagram uploads video with a large amount of compression. By uploading a video in true 4K, it provides YouTube the best data to process and results in a smoother final result.
1. Topaz Video AI: The Cinematic Industry Standard
Topaz is widely considered the gold standard for offline, local video reconstruction. Instead of general presets, it utilizes specialized AI models.
- How it handles AI video: The Iris model is brilliant for fixing distorted or soft AI-generated faces, while Proteus offers manual sliders to fine-tune sharpness and de-noise parameters independently so you don't "over-cook" the footage.
- The Catch: It requires a beefy, dedicated graphics card (GPU) and a flat investment, though it avoids recurrent subscription traps if you choose to stick with local rendering.
2. Pixop: The Cloud-Native Pipeline
If you don't own a powerful editing PC or need to scale up dozens of clips simultaneously, Pixop handles everything in the cloud via a clean web interface or developer API.
- How it handles AI video: It seamlessly brings lower-resolution AI clips to 4K HDR standards without bogging down your computer's hardware.
- The Catch: Pay-per-minute structures mean costs can scale up quickly if you are working with longer, high-frame-rate video files.
3. Video2X / Free Browser Tools: The Open-Source Route
For the best quality without any costs, open-source software such as Video2X (and other client-side browser versions like Free.Upscaler.Video) uses WebGPU or Vulkan to run the video on your device anonymously and securely.
- How it handles AI video: Through the use of Real-ESRGAN (for real-life footage and advanced texturing) and Anime4K (AI anime-style video), this platform offers similar quality of video rendering as subscription-based services.
- The Catch: The technical configuration can be troublesome, and the rendering speed is slow - around 1 to 2 frames per second on average hardware. As a result, a 1-minute video takes 20 minutes to render.
Top AI Video Upscaling Tools Compared
QWE AI Academy · Processing Optimization & Resolution Pipelines
| Tool | Best Fit | Processing Type | Pricing Model |
|---|---|---|---|
| Topaz Video AI | Cinematic post-production & local power | Local (GPU) / Cloud | $299/yr or $25/mo plans |
| Pixop | Automated workflows & cloud scaling | Cloud (REST API) | Pay-per-minute / Credit options |
| HitPaw VikPea | Multi-purpose creators & casual pros | Local (Desktop) | From $42.99/mo subscription structure |
| CapCut Desktop | Quick social content edits | Local / Cloud | Free tier / Pro tier subscriptions |
| Video2X | Budget creators & open-source fans | Local (Vulkan/GPU) | 100% Free (Open Source) |
Request A Custom AI Video
Tell us what you're trying to create and we'll point you to the right tool — or help you set it up.
1. The AI Architectures Underlying Upscaling: How the Pixels Are Really Rendered
- Traditional upsampling technology uses interpolation algorithms (bicubic, Lanczos), analyzing neighboring pixels and averaging their color values, filling in the gaps between pixels with this blurred "stretching".
- The AI approach to upsampling involves using deep convolutional neural networks and generative adversarial networks. Unlike the traditional approach that stretches the pixels, the AI technology identifies the object represented in the pixel (human eye, tire of a car, grass, etc.) and refers to the AI database with millions of high-resolution pictures.
2. Advanced Algorithmic Deep-Dive: The 2026 Model Lineup
To get clean 4K output without ruining your footage, you must match the specific neural sub-model to your source material.
A. Temporal Stabilization versus Spatial Upscaling
- One major problem of upscaling videos is called temporal shimmering, where an object is stable in one frame, moves slightly in another, and returns to its original place in yet another frame. The result is a very disturbing image of some sort of boiling pattern. Modern technologies manage this problem using Temporal Recurrent Networks that take into account several previous and subsequent frames.
B. The Primary Sub-Models Compared
- Iris (Face Re-Synthesis): Trained heavily on human anatomy. It focuses its computational power on reconstructing clean irises, teeth, skin pores, and hair strands.
- Proteus & Rhea XL (The Control Suite): These give you individual control parameters. If your AI-generated video has heavy compression blockiness, these models allow you to suppress the noise before the upscaling matrix applies sharpness.
- Real-ESRGAN/Anime4K: Designed for vector lines, solid colors, and sharp edges. When applied to real life, this causes humans to appear as plastic dolls, but these filters are perfect for creating AI anime or motion graphics.
3. Detailed Technical Workflow: Step-by-Step Production
1. Pre-Render Cleaning & Frame Trimming
- AI video generators frequently experience "generation drift"—where the first 5 frames or final 10 frames of a clip warp or stutter. Clip these frames out in your editor first. If your original clip has heavy macroblocking (pixel squares), apply a light spatial denoise pass before sending it to the AI upscaler.
2. Injecting Frame Interpolation
- Many raw AI videos generate at irregular frame rates (like 24fps with micro-stutters). Before or during your resolution bump, pass the clip through an interpolation engine like Chronos or Apollo. This creates entirely new "in-between" frames to elevate the file to a liquid-smooth 60fps, preventing choppy playback at 4K.
3. Calibrating Manual Sliders over Presets
Avoid "Auto" mode. Load a visually complex scene and adjust parameters manually:
- Set Revert Compression to 40-50% to melt away generative AI artifacts.
- Set De-Halo to 15% to eliminate ugly glowing white lines around high-contrast edges.
- Add 5-10% Anti-Flicker to stabilize temporal shimmering.
4. The 3-Second Regional Benchmark
- Select a 72-frame (3-second) section that contains fine details such as someone blinking or splashing water. Produce an uncompressed render. View the rendering at 100% zoom on a native 4K screen to check whether the AI is creating "hallucinated" geometry and waxy skin.
5. Stitching and Audio Timeline Re-Sync
- Choose an uncompressed, or near visually lossless, export codec. Because down-scaling, especially with higher resolutions and more processing, can sometimes result in frame dropping and can throw off time-based values (introducing what's called frame drift), import the upscaled 4K version back into your edit, and just drag it so that the very beginning lines up with the uncompressed one.
4. Hardware Demands & Processing Math
Upscaling isn’t just demanding—it scales exponentially. Jumping from 1080p to 4K isn't a 2x jump; you are moving from 2 million pixels per frame to 8.3 million pixels per frame.
The Render Math
Average render times – using a good consumer GPU running with something like Real-ESRGAN or Topaz Proteus - will likely get you in the ballpark of 1.5 frames per second.
- A 60-second video at 30fps would have 1800 frames.
- To convert just one minute of video at 1.5 fps will thus mean 20 solid, full-speed, full-throttle-rendering minutes.
- Remember to have 8GB VRAM minimum for your GPU to prevent crashes during rendering because of Out-Of-Memory (OOM) allocation problems.
4K Video Upscaling Guide
Compare the best tools to sharpen lines, clean artifacts, and boost your AI clips to 4K resolution.
It comes down to raw processing efficiency. Calculating thousands of moving pixels across dozens of layers requires massive data server power. To deliver your video in under a minute, platforms generate your raw clips at 720p or 1080p. Upscaling is treated as a separate, final step to polish the video without slowing down the initial creation phase.
Traditional upscaling simply stretches the existing canvas and repeats pixels, which results in a blurry, pixelated image. AI upscaling actually redraws the details. The model analyzes the scene and intelligently adds completely new, sharp details—like individual strands of hair, skin textures, and crisp text lines—making the video look like it was natively filmed in 4K.
The market is led by three heavy hitters: Topaz Video AI (the absolute gold standard for local desktop processing and fine detail recovery), Magnific AI (the undisputed king of hyper-realistic cloud upscaling and texture addition), and CapCut / Remini (the best accessible cloud options for quick social media touch-ups).
The creativity or **"Hallucination" slider** controls how much freedom you give the AI to invent new textures. Setting it low keeps the video identical to the original but sharper. Setting it high lets the AI hallucinate massive amounts of detail—like adding intricate bark patterns to a tree or dramatic wrinkles to clothing. For professional work, a moderate value of 2 or 3 works best.
Topaz features specialized sub-models for different flaws. Use Proteus or Iris if your video features human faces, as they are explicitly trained to fix eye distortions and skin smoothing. Use Artemis if your raw AI clip suffers from heavy motion blur or digital compression noise, as it cleans up artifacts without melting fine patterns.
It depends on the tool type. Local software like Topaz Video AI requires a powerful dedicated graphics card (NVIDIA RTX) to run at a reasonable speed, otherwise a 5-second clip could take hours to export. If you are working on a basic laptop or smartphone, choose cloud-based tools like Magnific or tensor-based web tools, where all the complex math is handled on external servers.
Never upscale messy footage. Follow this 3-step pipeline: First, review your low-res generation clip and trim out any sudden jumps or pixel warp errors. Second, run a mild de-noising pass to clear out compressed pixel blocks. Finally, pass that stabilized timeline into your 4K enhancer model, locking in crisp, clean layouts ready for major screens.
Ready to try AI Videos?
Transform your ideas into cinematic video in seconds.