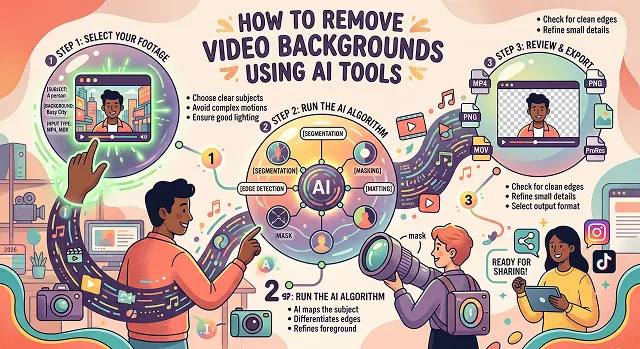
I used to keep a literal green bedsheet clipped to a curtain rod for recording talking-head clips, because a real green screen felt like overkill for a home office setup, and the bedsheet mostly worked, if you did not look too closely at the edges of my hair. That whole approach feels a bit silly in hindsight now that AI can do the same job from completely ordinary footage, no fabric required.
I filmed the same short clip in my actual messy home office, on purpose, not a clean studio, and ran it through five different AI background removal tools to see which ones handled the genuinely hard parts well: loose hair strands, a bit of natural movement, and a background that was not a single flat color.
The Short Version
Want the cleanest edge detail on hair and fast motion, and do not mind a slightly steeper interface? Runway handled our trickiest footage the best. Want one-click simplicity with editing tools built in right alongside it? VEED. You’re already recording and editing a talking-head video within the same app, and you need the background gone without ever changing applications. Descript. Something quick, easy, and actually free for a little blurb? Unscreen. And for basic marketing or social content where speed matters more than pixel-perfect edges? Canva gets it done with minimal effort.
1. Runway — Best Edge Detail on Hair and Motion
This is the one that handled our worst-case footage the best. It kept the thin hair intact rather than creating a blur of a soft halo effect and it did not create any flickering even when the hands moved rapidly, an issue that some other tools were facing on the same clip. It is designed as a part of a larger set of creative videos, so the background removal tool is coupled with more advanced compositing tools if required.
On the downside, its interface design focuses more on being a creative tool rather than a one-click application, meaning that there is a bit more to learn compared to Canva or Unscreen. Worth it if edge quality genuinely matters for your footage.
Cost-wise — there is a free tier with limited credits to test quality, with paid plans scaling for regular use.
2. VEED — Best One-Click Option With Editing Built In
VEED's background removal is genuinely one click, and the result on our test clip was solid, not quite matching Runway's hair handling, but clean enough for most talking-head and social content. What makes it worth a specific mention is what happens right after: captions, a new AI-generated background, and export are all in the exact same workspace, so you are not bouncing between apps.
There is also a background-expand feature that fills in the sides of a vertical clip if you need to reformat it horizontal, or vice versa, which is a genuinely useful extra most single-purpose background removers do not offer at all.
Cost-wise — there is a free trial to test the tool once, with a paid plan required to keep using it beyond that.
3. Descript — Best If You're Already Editing in It
If you are already recording and transcript-editing a video in Descript, its background removal, branded as an AI Green Screen effect, means you never have to leave the app at all. Toggle it on, keep a transparent cutout of yourself, and trim filler words, add captions, and adjust pacing in the same timeline.
For someone starting from scratch purely to remove a background, it is not the most obvious first choice, since you are bringing in a full editing suite for one specific task. For anyone already using it as their main editor, though, it is the most frictionless option on this list, since nothing needs re-exporting or re-importing.
Cost-wise — there is a usable free tier for shorter projects, with paid plans scaling around transcription hours and export limits.
Side-by-Side At a Glance
Tool · Best For · Trade-Off
| Tool | Best For / Trade-Off |
|---|---|
| Runway | Best edge detail on hair and fast motion. Trade-off: steeper interface than a simple one-click tool. |
| VEED | One-click removal with captions and export in the same workspace. Trade-off: hair detail slightly behind Runway on tough footage. |
| Descript | Zero app-switching if you already edit there. Trade-off: more tool than needed for a one-off background removal task. |
| Unscreen | Fast, free, genuinely no-fuss for short clips. Trade-off: watermark and length limits on the free tier. |
| Canva | Quick for marketing and social content, low effort. Trade-off: less precise on complex hair or fast motion. |
Request A Custom AI Video
Tell us what you're trying to create and we'll point you to the right tool — or help you set it up.
4. Unscreen — Best Free, Fast, No-Fuss Option
Unscreen does exactly one thing: upload a clip, and it removes the background automatically, no settings to configure. For a quick social clip or a short GIF, that simplicity is genuinely the whole appeal. Quality on our test held up reasonably well for a clip without especially complex hair or fast motion.
The free version comes with a watermark and length limits, which is a fair trade for something this fast and this simple. It is not the tool to reach for on a longer or more demanding project, but for a quick short clip, it is hard to beat for effort involved.
Cost-wise — free with a watermark and length restrictions, with a paid tier available to remove both.
5. Canva — Best for Quick Marketing and Social Content
Canva's background remover is not chasing frame-by-frame precision the way a dedicated video tool does, but for straightforward marketing clips and social content, it is genuinely quick, and it sits inside a tool a lot of small teams already use daily for everything else. Drop your clip in, remove the background, drop in a branded scene, done.
On genuinely tricky footage, hair, fast motion, semi-transparent objects, it is not going to match Runway's precision. For a product demo or a simple talking-head clip against a plain wall, it is more than enough, and the low effort involved is a real advantage for teams moving fast.
Cost-wise — included in Canva's standard free tier, with the paid Pro plan unlocking more background options and export quality.
Obtaining a Truly Clean Result
The tool is not what's important. Here are a few things that played a role in the outcome being cleaner compared to the selection of the tool:
- Contrast between you and the background helps more than a plain background does. A cluttered but high-contrast room can actually process cleaner than a flat but similarly-colored background where the AI struggles to find the edge.
- Frontal lighting is important. The shadows or back lighting are going to be way more problematic for the algorithm than an untidy room.
- Loose hair and fast hand gestures are the real stress test. If your footage does not have either, almost any tool on this list will give you a solid result. If it does, that is where the gap between tools actually shows up.
- Preview before committing to a full export. In most cases, there is an option to preview a small piece of the video, which helps to see if there is any flaw on the edge or flickering problem before doing a full render.
It never had anything to do with the actual fabric but rather providing the software with high-contrast edges for processing. AI tools just moved that job from your wall to the algorithm.
AI Video Matting & Isolation
Extract complex subject layers, eliminate color halos, and export clean alpha transparency channels.
The top specialized software choices depend heavily on your editor environment. For high-end desktop post-production, Adobe Premiere & After Effects (powered by the advanced Roto Brush 3.0 AI engine) and DaVinci Resolve's Magic Mask are the absolute gold standards for tracking complex geometries. If you prefer a fully automated, cloud-based pipeline running straight inside a web browser, Runway (Green Screen tool) and Unscreen offer rapid extractions without local GPU overhead.
Basic video segmentation processes frames as a strict binary layout mask—marking pixels as either 100% subject or 100% background, which yields blocky, pixelated, and jagged outlines. Professional AI Video Matting algorithms compute a detailed gradient scale of alpha values between 0% and 100%. This allows the extraction layer to smoothly preserve semi-transparent components like moving hair strands, mesh details, flying dust particles, and motion blur without flattening their textures.
Color bleeding happens when ambient light from the original backdrop wraps around the edges of your subject during filming. To strip this out, configure a workflow utilizing Edge Choking (Contraction) and Color De-contamination brushes. Shifting the boundaries of the alpha selection inward by just 1 or 2 pixels, or turning on automated color spill suppression, forces the cutout edge to blend seamlessly onto entirely new layout layers.
If an isolating tool calculates frame elements completely separately, the boundary lines will jump around slightly frame-by-frame, causing a distracting, amateurish shimmering or buzzing artifact. High-end tools enforce robust Temporal Consistency tracking, cross-referencing adjacent keyframes chronologically to ensure the mathematical boundaries lock perfectly onto the movement trajectory of the subject over time.
When a person introduces a new item (like a phone or product box) into the shot, automated tracking engines sometimes confuse it with the background layer and slice it away. To counter this, utilize an interface workflow that allows Positive and Negative Stroke inclusion (like After Effects or Runway). Manually place a positive tracking point directly over the item on the initial keyframe to force the AI to include it as a core part of the subject asset.
Never render your transparent projects into standard MP4 files, because the H.264 codec completely strips away alpha data, leaving you with a solid black backdrop. To maintain a clean, reusable transparent cutout asset, export your files using massive edit-ready codecs that natively support alpha tracks, such as Apple ProRes 4444 or GoPro CineForm (with Alpha activated). For web-based application interfaces, compile them into compressed WebM structures.
Follow this exact 3-Step Isolation Blueprint: First, trim your raw clip down to only the frames you absolutely need, and place positive anchor strokes over your subject inside your editor's AI workspace. Second, propagate the tracking forward, review the clip line for minor edge drops, and dial in fine-feathering or color suppression parameters. Finally, render the final asset layer using an uncompressed ProRes 4444 layout to preserve flawless transparency.
Ready to Ditch the Green Screen?
Clean up your background in minutes, no fabric required.