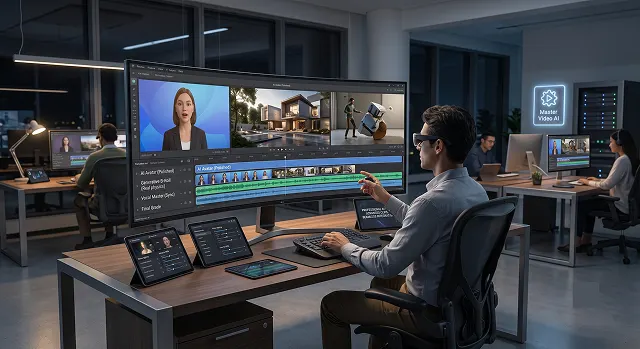
To make a polished video out of only AI would be possible by joining together glitchy and deepfake video clips that are extremely artificial. Currently, the AI video engines can deal with physics, lighting, and vocal synchronization in a realistic way.
Creating a high-quality video from scratch without a camera and studio is possible if one treats the AI as a decentralized Hollywood crew.
Step 1: Write the "Director’s Brief" (Script & Planning)
Before you start working with any video tools, come up with your blueprint first to plan out the important elements of your video. Within AI engines, you need very specific parameters to avoid visual "hallucinations" like when a character suddenly has an extra finger or something appears instantly in the background.
- Pacing Rule: Create around 150 words per minute in your video so that you can give the AI voiceover enough time to breathe normally.
- Hook: Five seconds only for intro.
- The Format: Immediately decide whether you are filming in widescreen (16:9 for YouTube) or in vertical format (9:16 for TikTok/Reels). Changing the format after rendering is going to destroy the composition.
Step 2: Use "Structured Prompting" for Visuals
If you prompt an AI with "a person drinking coffee," you will get a generic, unstable clip. Professional results require Structured Prompting, which outlines the camera, environment, and lighting explicitly.
The Professional Prompt Formula:
[Subject] + [Action] + [Environment/Setting] + [Lighting Type] + [Camera Shot & Movement]
- Bad Prompt: "Coding male on laptop."
- Professional Prompt: "There is an artist creating on his computer. He has a mechanical keyboard and is in a cyberpunk styled room illuminated by the blue and purple neon lights and fog emitting from the bottom of the room to the overhead lights. The dolly-in move will be slow motion with a 4K resolution and photorealistic texture."
- Pro Tip (Still Image -> Video): In order to make sure that your characters or products appear exactly the same in all your clips, start by generating one high-quality still image (Midjourney / Firefly) first. Then upload the generated image to your video generator (Kling / Runway) and ask the AI to animate it for you.
Step 3: Generate the Audio Track First
A typical error made by beginners is creating video clips and trying to fit a voiceover into them. Create your audio clip first and then create your video clips that follow the rhythm of the voice.
1. Create the Voiceover
- Enter your script in the AI voice generator such as ElevenLabs or HeyGen. Select a voice with natural rhythms, pauses, and breathing sounds.
2. Animate the Talking Head (If applicable)
- If you have a talking head (avatar speaking straight to the camera), then enter your new audio file to HeyGen or Synthesia. This AI will synchronize mouth movements (lip-sync) with your audio.
3. Layer Ambient Sound and Music
- Create an AI music track (with Suno or Udio) for a nice background tune. Set its volume low enough not to interfere with the voiceover.
Step 4: Piece It All Together (AI Editing)
After collecting your B-roll footage (Runway/Kling) and A-roll voiceovers (HeyGen), you can put everything together in an AI video editor such as CapCut or Descript.
- Let the Audio Guide the Cut: Drop your continuous audio track onto the timeline. Slice up your visual clips and overlay them right as the topic changes in the audio.
- Temporal consistency: If your video experiences any small glitch at the very end of your video, like bending in background of your video at end (trim last second on your editor for best results). Best is to keep three-second long footage, than keeping a five second video.
- Use Automatic caption: Try the 1-click automatic captioning on the video editing. Keep the captions between two to three words and the texts on the bottom of the video screen as central as possible.
Choose the Right Tool for the Job
Workflow Diversification · Leading 2026 Tools Matrix
| Platform Type | Best For | Leading 2026 Tools |
|---|---|---|
| Cinematic Photorealism | High-end B-roll, atmosphere, lighting | Google Veo 3.1, Kling 3.0, Runway Gen-4.5 |
| Talking Head / Presenter | Realistic digital actors presenting to camera | HeyGen, Synthesia |
| All-in-One Editor | Stitching clips, adding captions, quick adjustments | CapCut (Seedance 2.0), Descript |
Request A Custom AI Video
Tell us what you're trying to create and we'll point you to the right tool — or help you set it up.
Pre-Production: The Continuity Blueprint
The biggest giveaway of an amateur AI video is visual drift—when a character’s face changes, their clothes swap colors, or a room's architecture morphs between shots. You fix this before you generate a single frame by building a Style Guide.
- Set a Universal style prompt: Choose a single stylistic marker and insert it at the bottom of each prompt.
- For example: "Shot on 35mm Arri Alexa, cinematic lighting, shallow depth of field, muted color palette, 8k resolution"
- The character seed trick: If your clip has a specific, recurring, non-AI generated person, (say, for example, a standard looking person in a B roll shot) try creating the first shot using an AI Image Generator. Create a character sheet (the same person viewed from different angles) using the original image in video generator tool of your choice so that they look the same in all clips.
Advanced Visual Generation: Directing the AI
When using high-end video generators like Runway Gen-4.5 or Kling 3.0, raw text prompts often give unpredictable motion. To command the frame like a real DP (Director of Photography), use these advanced control mechanisms.
Camera Control & Motion Brushes
Most top-tier engines offer structural controls over the camera. Don't let the AI decide how the camera moves.
- Pan & Tilt: Use a slow horizontal pan shot when you need to introduce the viewer to the new setting.
- Zoom/Dolly: A slight “Dolly In” is useful for creating tension or when you want to emphasize a certain emotional element in the frame.
- Motion Brushes: Software such as Runway includes a brush that allows you to select a particular area (such as a waterfall or even hair) and tells the software to only move this part and not warp everything else in the background.
The Physics Cheat Sheet
AI natively struggles with complex physics (like a hand pouring water into a glass perfectly).
- The Secret: Prompt the reverse or prompt the micro-moment. Instead of prompting "a man builds a brick wall," prompt "a close-up shot of a gloved hand placing a single brick onto wet mortar." Smaller actions have a 90% lower failure rate in AI physics.
Audio & Voice Engineering
Bad audio ruins good video faster than anything else. To make AI voices sound human, you have to engineer the delivery.
[Voice Engine] ──> [Add Punctuation for Pacing] ──> [Adjust Stability/Clarity]
- Punctuation is Direction: A major characteristic of AI voice generation (eg., ElevenLabs), is how punctuation translates into an actual physical pause. If you feel your lines were read to quickly; just insert a dash (-) or even an ellipsis (. . .), to make the AI actually breathe.
- Performance: Better voice tools have a slider for stability and one for clarity or overexaggeration.
- High Stability = Great for monotone corporate narrations.
- Lower Stability = Introduces human-like vocal imperfections, cracks, and emotional shifts. For a cinematic video, lower the stability slightly to get a more passionate, lifelike performance.
Professional AI Video
Ditch the generic clips and build cohesive, studio-grade media completely through software.
It comes down to Character and Asset Continuity. Casual videos look messy because faces, backgrounds, and lighting shift wildly with every single cut. Professional workflows use persistent reference layers—defining a consistent character element or asset seed up front so the subject maintains the exact same facial structure, attire, and color grade across every single scene.
Always choose Image-to-Video for core production. Text prompts give the AI too much freedom, leading to visual hallucinations. The professional path is to generate a flawless, high-detail static still image first (using a tool like Midjourney) to lock down composition and branding. Then, pass that exact image into your video model to safely add motion.
Flickering happens when a model lacks solid physics calculations. To bypass this, specify structured cinematography prompts like "slow dramatic push-in dolly shot" or "fixed camera orbital pan." Dictating slow, calculated technical movements gives the modern 2026 physics engines the time they need to keep pixels completely stable.
Never generate video clips and then try to stretch audio to fit them. The professional rule is to master the voiceover first as a singular, continuous audio track. Once your pacing, pauses, and speech delivery are locked down, you chop up and layer your generated B-roll scenes directly over that vocal blueprint to maintain a perfect human rhythm.
The pro workflow is completely model-aware. Creators don't rely on a single engine. They use flagship multi-parameter models (like Google Veo 3 or Sora 2) for complex, high-fidelity narrative close-ups, faster models for rapid social B-roll generation, and dedicated avatar layers for talking-head segments, combining the assets in a final timeline.
Avoid boring, flat subtitles. Use Automated Kinetic Captions that turn spoken dialogue into a visual performance. High-end editing layers can automatically sync text animations to vocal syllables, using slight scale changes or highlight tracking colors to capture user attention within the first three seconds of a silent feed scroll.
Let AI build the frame, but use your hands to finish it. Use an automated pipeline agent to handle the 80% foundation work—scripting, layout building, rough clip assembly, and basic transcription. Then, dedicate your creative focus to the remaining 20% premium refinement—swapping critical hero frames, tweaking color grades, and hand-polishing high-impact hooks.
Ready to try AI Videos?
Transform your ideas into cinematic video in seconds.