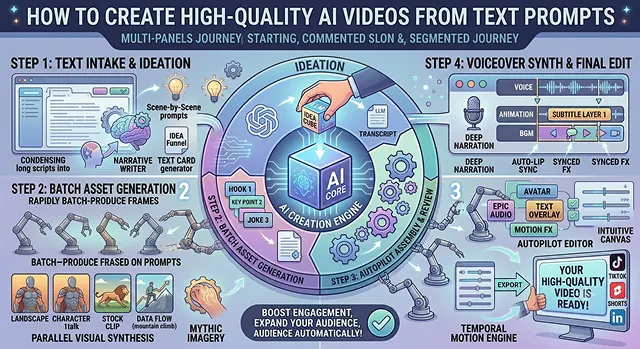
When you have tried creating an AI video yourself, you will know the disappointment that comes from entering a beautiful prompt and getting back something like a blurry mess where people have six fingers and the background is melting.
But true professional-quality AI videos don't just happen by chance. They involve knowing the precise pipeline used to create those videos.
This guide gives you all the steps necessary to turn your text prompt into a high-quality AI video.
Master the 4-Part Cinematic Prompt Formula
The main problem that newbies face when creating prompts is writing one such as: "a man walking on a street." The AI needs to come up with everything else, hence the unpredictable, poor quality result.
If you want to produce pro-level footage, here is the blueprint for your prompt:
[Subject] + [Action/Environment] + [Camera Work/Lens] + [Lighting/Style]
Let’s break a high-quality prompt apart:
- Subject: An athletic-looking astronaut wearing a worn-out space suit.
- Setting/Actions: Moving slowly on a wet alleyway with neon lights in heavy rainfall. Refraction of neon lights in water puddles.
- Camera motion: Low angle tracking shot, slowly zooming in, shallow depth of field.
- Lighting & Style: Cinematicanamorphic lighting, photorealistic, 35mm film grain, 8k resolution,volumetricsmoke.
The Full Combined Prompt:
“Low-angle tracker of a hard-bitten astronaut in worn spacesuit slogging through a rain slicked, cyberpunk alley illuminated with heavy neon lighting, reflections on puddle surfaces, slow push-in, shallpw depth of field. Cinematic anamorphic lighting, photorealistic, 35mm film grain style, volumetric smoke.”
Utilize the Step by Step Generation Workflow
When you have your prompt prepared, avoid creating a 10-second video hoping for the best. Go through the following technical workflow to ensure that you use up fewer credits and get premium results:
Generate a High-Resolution Base Image
- Instead of going straight from text-to-video, generate a highly detailed static image first using Midjourney or Flux. AI models handle details much better in static images. This acts as your visual anchor.
Utilize Image-to-Video (I2V)
- Upload your perfect base image into your video generator (like Kling AI or Runway). Paste your original prompt, but focus heavily on describing the motion rather than the objects (e.g., "The smoke curls slowly, the neon lights flicker faintly").
Apply Motion Brushes and Director Controls
- Use the platform's advanced camera controls. Set your pan, tilt, or zoom speeds to "low" or "subtle" (around 0.2 to 0.4 intensity). High motion settings cause the AI to tear the image geometry apart.
Extend and Stitch Clips
- You have to break down your video down into 4 to 5 second segments of footage. Rather than try to generate one big 20 second clip, you will instead use the "Extend Video" option for seamless footage.
The Post-Production Polish (The "Secret Sauce")
A video generated by an AI engine is almost never as good as a Hollywood production. To make sure that the video quality is as good as possible, there are two post-processing techniques that you need to apply:
1. Cinematic Video Upscaling
Video engines produce low resolution video (either 720p, or compressed 1080p). Upsample the video through AI video upscaling software (e.g. Topaz Video AI or other alternatives on Hugging Face/Replicate) to have better texture quality.
2. Audio Design & Lip-Syncing
A high-quality visual with poor audio feels incredibly cheap.
- Voice & Dialogue: If you have characters in the video… use a specialized product like Hedra or ElevenLabs to create an exact match of synchronized movements and voices.
- Sound effects: Subtly apply background ambient tracks like distant sounds, city noises, distant sirens etc… using an editor like Premiere or CapCut. These sounds will cover the imperfections in the physics.
Choose the Right Tool for Your Specific Goal
Strategic Orientation · Video Synthesis Matrix (2026)
| Tool Category | Best For | Top Platforms (2026) |
|---|---|---|
| Hyper-Realistic Film & Cinema | Photorealistic physics, complex camera panning, and cinematic lighting. | Sora, Kling AI, Luma Dream Machine, Runway Gen-3 |
| Character Animation & Lip-Sync | Generating a consistent virtual host or actor speaking directly to the camera. | Hedra, HeyGen, Synthesia |
| Stylized / Anime / Concept Art | Translating vivid, artistic, or stylized animation prompts without losing structure. | Wan 2.2, Midjourney-to-Video models |
Request A Custom AI Video
Tell us what you're trying to create and we'll point you to the right tool — or help you set it up.
The Architecture of a Perfect Cinematic Prompt
AI models do not think like us humans. When one types in "A detective looking out of a window," the AI would have to guess what time it is, what perspective it should be shot from, what kind of film is used, how the room looks like, and the weather.
In order to limit AI "hallucinations," one should use the 4-Part Cinematic Prompt Formula:
Prompt = [Core Subject] + [Environment & Action] + [Camera Lens & Movement] + [Lighting & Aesthetic]
Breaking Down the Formula
To see how this works in practice, let's dissect a professional-grade prompt:
- Core Subject: A weary detective in a wet, tan trench coat.
- Environment & Action: Inside a darkened office, looking out of a rain-slicked window over the bright glow of a cybernetic city-scape. He sips slowly on a glass of amber colored whiskey.
- Camera lens & Movement: Slowanamorphic pan. Close, cinematic closeup. 35mm. Shallow depth of field.
- Lighting & Aesthetic: Moody, film-noir aesthetic, heavy, volumetric lighting, neo blue and orange color grading, sharpened realistic textures.
Secret Workflow (Text to Image to Video)
When you input a long text prompt directly into the video generator (Text to Video) tool, the AI has to simultaneously generate objects and animations. That’s how you quickly get deformed faces and melting landscapes.
Instead, go for the standard industrial workflow of Image to Video (I2V):
Generate the 'Hero Frame' (Text-to-Image)
- First of all, take your very precise prompt and generate an image using a specialized tool for that. Work on this particular image until it looks perfect regarding faces, clothes, and the background."
Isolate the Motion (Image-to-Video)
- Upload your perfect "Hero Frame" into your video generator (like Kling AI or Runway). Now, your prompt changes. You no longer need to describe what the character looks like. Strip the text down to focus only on the physics of movement (e.g., "The detective slowly turns his head, rain streams down the glass pane outside, subtle ambient dust floating in the light beams").
Dial Down the Motion Weight
- Find a feature called “Motion Slider” or “Motion Brush.” Set the value of the intensity to 2 or 4 out of 10. The high weight of motion makes the AI distort the picture a lot, thus leading to extra limbs and melting faces.
Extend by Iteration
- Never try to generate a 20-second clip in one go. Generate a perfect 4-second clip. Use the platform’s "Extend" or "Continue Video" feature to generate the next 4 seconds using the final frame of your first clip as the new anchor point.
Post Production Touch-ups (Repairing the AI Glitches)
Even the top-end AI video producers churn out compressed, slightly blurry, and absolutely mute files. In order to convert your basic AI output into high-quality, high-paying AdSense videos or viral content, a post production step is required.
1. Spatial Upscaling (Making Your Video 4K)
While AI software provides you with video in resolutions of 720p or highly compressed 1080p, they have to be up-converted to be as clear as actual films. You can use specialized video upscaler tools like Topaz Video AI or an open-source tool on Hugging Face such as Real-ESRGAN and Super Res models.
2. Audio Layering and Foley
Sound fully covers any visual flaws. When the hands look a little bit strange for just a few seconds, the loud sound effect of hitting something or music will prevent the viewer from seeing it.
- Ambience: Apply room sounds, wind, and rain sounds on top in CapCut or Premiere Pro.
- Voice/Sound Synchronization: In case your character says something, export your upscaled video and use Hedra to synchronize voice with the lips' movement.
Text-to-Video Step Guide
Master the exact structural formulas needed to turn text strings into cinematic 4K motion graphics.
To prevent the AI from scrambling pixels, write your prompt in a specific, multi-layered layout: [Subject] + [Action/Environment] + [Camera Direction] + [Lighting Style] + [Cinematography Blueprint]. For example: "A detailed 3D metallic robot walking through a neon-lit cyberpunk alleyway, slow dramatic dolly zoom, volumetric blue rim lighting, filmed on an anamorphic 35mm lens."
Flickering and morphing usually happen when your text forces too much chaos at once. The step-by-step fix is to use Image-to-Video Conditioning. Instead of typing text straight into a blank canvas, generate a perfect, high-resolution static frame first (using an image model like Midjourney). Then upload that still to your video engine (like Runway or Kling) to animate it safely.
The **Motion Slider** determines how much physical energy is inside your scene. Setting it too high leads to crazy artifacts and warping; setting it too low creates stiff, boring statues. For a natural cinematic look, set the motion factor to around 4 or 5 and use the manual **Camera Buttons** (Pan, Tilt, Zoom) to control your layout perspective instead.
Most engines render raw base files at 720p or 1080p to keep processing speeds fast. Once your short clip is done, use the tool's native AI Upscaling or Enhance button. This feeds your timeline into a specialized detail model that redraws the edges, sharpens hair and text, and outputs a high-fidelity 4K file ready for professional client screens.
Negative prompt blocks dictate exactly what the generative model should stay away from. If your generations keep coming out looking blurry or blocky, fill your platform's negative parameter section with words like: "deformed geometry, bad anatomy, motion blur, text watermarks, low resolution, over-saturated colors, flickering pixels."
Yes, using the Extend Video / Temporal Stitching feature. If you love how your first 5 seconds look, click the "Extend" button. The engine freezes the very last frame of your generation, reads it as the brand-new reference image layer, and lets you append another 4 or 5 seconds of logical motion tracking onto the timeline.
Follow the professional 4-Step Blueprint: First, lock in your structural layout with a clean prompt formula or front image anchor. Second, adjust motion scaling down to a steady cinematic level (value 4-5). Third, run a low-resolution test generation to verify the tracking motion bounds. Finally, apply upscale enhancers to lock down crisp, professional assets.
Ready to try AI Videos?
Transform your ideas into cinematic video in seconds.