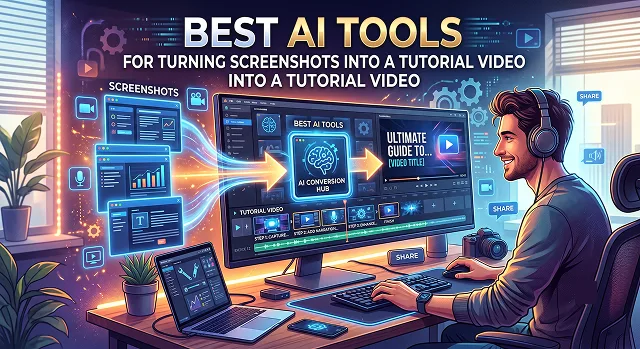
I used to think making a tutorial video meant one thing: opening a screen recorder, doing the whole task live, messing something up halfway through, and starting over. Turns out that's not actually necessary anymore — if you've already got screenshots from doing the task once (which most people do, whether it's for documentation, a support ticket, or just habit), you can turn those directly into a full walkthrough video without re-recording anything.
This is genuinely one of the more underused AI video workflows, mostly because people don't realize screenshots-to-video is even an option. So here's how it actually works.
The Short Version
Want a tool built literally around this exact task — screenshots in, narrated video out? TechSmith's AI Tutorial Video Generator (built on Camtasia) does that directly. Already have a screen recording rather than static screenshots, and want narration and structure added automatically? Guidde. Need both a polished video and a proper written help article from the same source material? Clueso. Building interactive, click-through product demos rather than a passive video? Supademo. And if you're starting from a mix of screenshots, docs, and even just a product URL and want a fully branded, story-structured video? Ngram.
1. TechSmith AI Tutorial Video Generator — Best Direct Fit
This is the one built for exactly the task in this article's title. Drop in your screenshots, describe what's happening in each one, and it writes a script and generates narration that matches the visual steps — no live recording, no mic needed. The software did an excellent job of processing our image that had some blur in it, because it uses both the input from your side as well as the image for creating content.
Because it is created by the makers of Camtasia, there is a real solution if you need to customize branding or create quizzes and so on: You can actually take the result of your work right into Camtasia for editing if necessary. However, most tutorials would not require any additional work inside Camtasia.
Cost-wise — it's positioned as a lighter-weight companion tool to Camtasia, with the full editor available as a paid upgrade path for anyone who outgrows the basics.
2. Guidde — Best for Turning a Quick Recording Into a Polished Guide
Guidde leans slightly more toward "record your screen while you work" than "upload existing screenshots," but it handles both well, and it's worth including here because of how little friction there is in the process. Capture a workflow through its browser extension, click stop, and it automatically structures the steps into a slide-by-slide guide with AI voiceover and callouts already added.
Nobody needs to be comfortable narrating on a mic for this to work — you don't record your voice at all, the AI writes and reads the script based on what it sees you doing. That removed the single biggest bottleneck when I handed a version of this workflow to a colleague who genuinely hates being recorded talking.
Cost-wise — there's a usable free tier for individual creators, with paid plans scaling for teams that need more storage, branding, and collaboration features.
3. Clueso — Best for Video Plus a Written Guide Together
Clueso's real strength shows once you need more than just a video. It accepts screen recordings, uploaded screenshots, slide decks, or documents, and generates both a polished walkthrough video and a structured help article from the same source — which saves genuinely duplicated effort if your team needs both a video and written documentation for the same process.
It's priced accordingly for that broader output, and it's aimed more at teams building an actual knowledge base than someone who just wants a single quick video. If your only goal is one tutorial clip, this might be more capability than you need. If you're building a library of support content over time, the dual output starts paying for itself fast.
Cost-wise — it sits toward the premium end of this category, priced for the combined video-plus-documentation workflow rather than video alone.
Side-by-Side At a Glance
Tool · Best For · Output
| Tool | Best For / Output |
|---|---|
| TechSmith AI Tutorial Generator | Direct screenshots-to-video with AI-written narration, plus a Camtasia export path. Best for quick, no-frills training and support videos. |
| Guidde | Fast browser-captured workflows structured into a narrated slide-by-slide guide. Best for creators who don't want to record their own voice. |
| Clueso | Video and written help article generated together from one source. Best for teams building an ongoing knowledge base. |
| Supademo | Interactive, click-through demos alongside standard video output. Best for self-serve product tours on a website. |
| Ngram | Story-structured videos from mixed sources with strong visual consistency. Best for longer, brand-conscious tutorials. |
Request A Custom AI Video
Tell us what you're trying to create and we'll point you to the right tool — or help you set it up.
4. Supademo — Best for Interactive, Click-Through Demos
Supademo does something a little different from the rest of this list — instead of (or alongside) a passive video, it can turn your captured screens into an interactive, clickable demo that a viewer navigates themselves, at their own pace, rather than just watching play out.
When using videos on a web page to explain a tour through products for self-service, this interactivity is much more interactive than a mere video. In the case of an instructional guide for internal consumption, a simple video can serve well, since it’s easier for both the author and the consumer, so tailor the medium to the actual use case.
Cost-wise — there is a good free tier allowing for many videos, thus giving a chance to try before committing to any subscription fees.
5. Ngram — Best for Mixed Source Material and Brand Consistency
Ngram's angle is treating your screenshots, docs, or even a plain product URL as raw material for a proper story-structured video — it plans a narrative arc (problem, walkthrough, resolution) before generating scenes, rather than just stitching your images together in the order you uploaded them.
The visual consistency across scenes was noticeably better than tools that generate each step somewhat independently — fonts, colors, and style stayed unified throughout, rather than subtly drifting scene to scene. That consistency matters more than it sounds like it should once a tutorial runs past 90 seconds or so.
Cost-wise — there's a genuinely usable free plan to test full videos before paying, with paid tiers scaling from there for heavier production needs.
A Note on Screenshots vs Screen Recordings
Worth clarifying, since it trips people up: static screenshots and a screen recording aren't quite interchangeable inputs, even though most of these tools accept both. A screenshot shows a single moment — the AI has to infer what happened between two images. A screen recording shows the actual movement, clicks, and transitions, which generally produces a more accurate tutorial with less guesswork from the AI.
- If you already have screenshots from an old ticket or doc, tools like TechSmith's generator are built to work well from exactly that starting point.
- If you can re-do the process once, a quick screen recording through something like Guidde or Clueso will generally produce a cleaner, more accurate result than reconstructing it from static images.
- Either way, describe what's happening in each step yourself where the tool allows it — a short caption per screenshot dramatically improves how accurately the AI narrates that section.
The best tutorial video isn't the most polished one — it's the one that gets published instead of sitting in a folder called "explain later."
Screenshot to Tutorial Guide
Animate static dashboard screenshots into interactive, step-by-step video instructions instantly.
The top platforms for this specific workflow include Guidede and Scribe AI for rapid browser-extension documentation, and HeyGen AI Studio or Canva Video AI for presentation-style video guides. For training modules that combine dashboard images with an interactive teacher profile, Synthesia leads the enterprise onboarding space.
It applies Dynamic Layout Pan-and-Zoom scripts. Instead of displaying a boring, unmoving image, the AI reads the text layers inside your screenshot. When the accompanying audio voiceover references a specific button like "Click Settings," the layout software smoothly zooms into that exact corner element and overlays a mock cursor click animation.
Yes, this is known as an automated OCR-to-Script generation pipeline. The AI's optical character recognition engine scans the dashboard headings inside your images, figures out what application you are explaining, and drafts a human-like script. It then routes that text through an ultra-realistic voiceover library so a clean narrator reads the steps perfectly.
Many specialized screenshot platforms feature an automated AI Redaction / Smart Blur brush layer. Before compiling the animation timeline, you can tell the engine to auto-hide things like email addresses, API authentication tokens, pricing balances, or user avatars. The system replaces those text blocks with a clean blur effect that stays in place even when zoomed.
This is the main benefit of an asset-driven workflow. Instead of re-recording a screen capture from scratch because a layout shifted, these systems use a Modular Step Structure. You navigate to the specific timeline step, drop in a fresh screenshot asset, and the AI keeps your existing voiceover track and caption frames perfectly intact without altering the surrounding video timeline.
Yes, and it’s a critical feature for global expansion. Tools translate your core script text into over 80+ languages with a single click. The AI models match your localized text structure to matching vocal cadences, ensuring the visual pacing doesn't break when a Spanish translation runs longer than the original English clip.
Follow the professional 4-Step Blueprint: First, lock in your structural layout with a clean prompt formula or front image anchor. Second, adjust motion scaling down to a steady cinematic level (value 4-5). Third, run a low-resolution test generation to verify the tracking motion bounds. Finally, apply upscale enhancers to lock down crisp, professional assets.
Ready to Publish That Tutorial?
Turn a folder of screenshots into a finished video today.