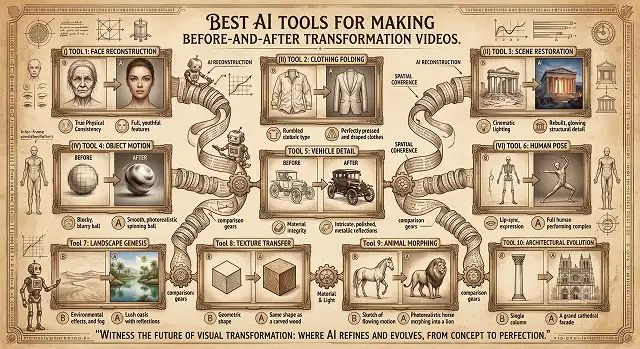
There's a reason transformation content — fitness progress, home renovations, makeup looks — consistently pulls higher watch-through rates than almost anything else on TikTok, Reels, and Shorts: people can't look away from a big change happening in a few seconds.
The catch used to be production time. Getting a clean before-and-after reveal meant frame-by-frame editing, careful masking, and lining up two clips by hand so the cut didn't look jarring.
That part's mostly solved now. A newer batch of tools can morph two images into each other, restyle existing footage, or even generate a plausible "after" from a single "before" photo. I tried out the ones people actually recommend for this and sorted out which is worth your time below.
The Short Version
A need to get an actual AI-powered morphing transition from the first photo into the second, and not simply fading? This can be achieved by using the transition tool offered by Higgsfield. The fastest and most informal way of doing a video on mobile phone for posting on social networks? CapCut. A special program designed for showing two images side by side for the purpose of Reels and TikTok videos? ReframeX. Just want a very simple morphing procedure between two photos? Media.io. Everything in one browser? VEED.
1. Higgsfield — Best for a Genuine AI Morph
This is the one that actually delivers on "before turns into after" rather than a simple cross-fade. Upload the two clips or images, pick a transition style, and the AI analyzes both to generate a genuine morph — the outdated cabinets visibly warping and repainting themselves into the finished kitchen, rather than one photo just dissolving into the next.
It's a step up in visual sophistication from a basic wipe or slider, and it shows in the final result — several people I showed the clip to asked how it was filmed, which is exactly the reaction you want. The trade-off is that it's a more premium, purpose-built transition tool rather than a full editing suite, so you'll likely still assemble the final post elsewhere.
Cost-wise — it runs on a credit-based system geared toward this kind of premium transition effect specifically, rather than a flat low-cost plan.
2. CapCut — Best Fast, Free, Mobile Option
CapCut's wipe, slide, and split transitions are built right into an app most people already have on their phone, which matters more than it sounds like it should. No new account, no separate render step — shoot the before, shoot the after, cut them together with a swipe transition and a "before/after" text overlay, done in a few minutes.
It's not doing a true AI morph the way a dedicated tool does — this is closer to a clean, well-timed cut than a generated transformation. For quick social content where speed matters more than a cinematic reveal, that's a completely reasonable trade, and it's genuinely hard to beat for the price.
Cost-wise — the core transition and editing tools are free with no watermark, which is unusually generous for this category.
3. ReframeX — Best for the Split-Screen Reveal Format
ReframeX is built specifically around the side-by-side and stacked split-screen format that does so well on Reels — the kind where before and after sit next to each other on screen at the same time, rather than one replacing the other. It handles the vertical framing and layout automatically, which normally takes real manual fiddling to get right.
The automatic captioning labeling each side "Before" and "After" is a small detail that saves genuine time, and it's easy to skip if you're not paying attention to the little stuff. If your format is specifically the split-screen comparison rather than a single morphing reveal, this is the more purpose-built choice over a general editor.
Cost-wise — there's a free tier with no watermark, which is a real advantage if the split-screen format is your main use case.
Side-by-Side At a Glance
Tool · Best For · Format
| Tool | Best For / Format |
|---|---|
| Higgsfield | Genuine AI morph where one scene visibly transforms into the next. Best for a cinematic, "how did they film that" reveal moment. |
| CapCut | Free, fast wipe and slide transitions built into a mobile app. Best for quick social clips where speed beats polish. |
| ReframeX | Purpose-built split-screen and stacked comparison layouts. Best for the side-by-side reveal format popular on Reels. |
| Media.io | Simple two-photo morphing with an optional style prompt. Best for a single static-to-static transformation without much setup. |
| VEED | Full browser editor with transitions, captions, and sound effects together. Best for a longer video with a transformation moment built in. |
Request A Custom AI Video
Tell us what you're trying to create and we'll point you to the right tool — or help you set it up.
4. Media.io — Best for Simple Photo-to-Photo Morphing
If you're starting from two still photos rather than video clips, Media.io keeps this about as simple as it gets — upload your first image and your last image, add an optional style prompt, and it generates the in-between motion connecting them. No timeline, no manual keyframing.
It handled our kitchen photos well for a static-to-static transformation, though it's worth knowing this is aimed at exactly that use case — two photos becoming a short clip — rather than a longer, multi-scene transformation video with several reveal moments stitched together.
Cost-wise — there are free credits on signup to test the workflow, with paid options for heavier or more frequent use.
5. VEED — Best All-in-One Editor With Transitions Built In
VEED's approach is broader than a pure transition tool — you get the morph-style AI transition alongside a full browser editor, so captions, background music, and sound effects (including an automatic "whoosh" that lands right on the reveal) all live in the same workspace. That matters if your transformation video is part of a longer piece rather than a single 10-second clip.
The transition options range from simple presets to fully custom, prompt-described transitions, which gives more creative range than most dedicated transition tools offer. The trade-off is a slightly more involved interface than a single-purpose app, since you're working inside a full editor rather than a narrow, one-job tool.
Cost-wise — the subtitle and basic editing tools are usable on the free plan, with watermark-free exports and the premium transition effects gated behind paid tiers.
A Few Things That Actually Make These Videos Work
- Match the camera angle exactly. Same position, same framing, same lighting for both shots. This one habit does more for a convincing transformation than any transition effect layered on top.
- Don't rush the reveal. If the "after" shows up too fast, the payoff feels flat. A short beat of anticipation before the switch genuinely makes the contrast land harder.
- Keep it honest. If you're showing a real result — a renovation, a project, a piece of work — represent it accurately. Editing a genuine transformation to look more dramatic than it actually was tends to backfire once people realize the gap between the video and reality.
- Mark your “before” and “after” distinctly. It might seem self-evident, but having to stop and work out which is which robs the viewer of the emotional impact you hoped to achieve.
The best transformation videos aren't the ones with the flashiest transition — they're the ones where the "before" and "after" are both real enough that the contrast speaks for itself.
That's worth sitting with for a second, especially for personal or fitness-related transformation content specifically. A slick morph effect can make almost anything look dramatic, but the tools work best in service of a genuine result — not as a substitute for one.
Transformation Video Toolkit
Master the tools that smoothly morph, slide, or slice between your initial states and final results.
The top platforms for transformation reveals vary by workflow: Media.io (AI Transition Maker) is the king of seamless image-to-image morphing transitions. Magiclight.AI features a dedicated transformation editor that matches faces across states. For environment swaps or structural changes, Luma AI Video-to-Video and Invideo VFX House (powered by Kling o1) provide studio-grade restyling without altering original motions.
It utilizes Multimodal End-Frame Conditioning. Instead of blindly animating an image outward, you upload both your "Before" photo (as the start frame) and your "After" photo (as the end frame). Tools like Media.io analyze matching structural coordinates across both files and generate a frame-consistent morphing sequence that smoothly bridges the visual transformation over 5 to 10 seconds.
Platforms like Invideo and FlexClip offer built-in comparison and frame-division modules. You simply apply the "Split-Screen" effect in your workspace settings, map your media assets to the left and right panels, and let the layout automation handle the alignment. You can customize the divider border width and apply sliding wipe animations to make the reveal look professional.
This is handled by specialized engines like Magiclight.AI using a process called Latent Identity Locking. When you ask the AI to change an attribute (like adding makeup or swapping outfits), the system isolates and locks your facial structure parameters first. It edits only the targeted details, ensuring your subject retains their exact identity through every frame of the reveal.
Yes, this is known as AI Video-to-Video Scene Transformation, and it's perfect for home renovation or interior design reveals. Tools like Luma AI analyze your source footage, locking onto structural boundaries, object positions, and camera pacing. When you type a prompt like "ultra-modern minimalist living room," the AI restyles the entire environment while preserving the original layout motion flawlessly.
Engines like VideoGen feature integrated tracking overlays designed specifically for comparisons. You drag a text callout or arrow element over a specific area (such as a skin blemish or a renovated cabinet corner), and the AI's spatial tracker locks onto those coordinates. The callout stays perfectly pinned to the target even if the video camera rotates or pans around the scene.
Lead with the final result. Traditional editing puts the result at the end, but social algorithms favor immediate hooks. Put a 2-second flash of your dazzling "After" transformation in your opening frame alongside a fast subtitle hook like: "How we fixed this room in 4 days." Then loop back to your steady before-to-after timeline progression to lock down high viewer watch time.
Ready to Build Your Reveal Video?
Turn two photos into a satisfying transformation in minutes.