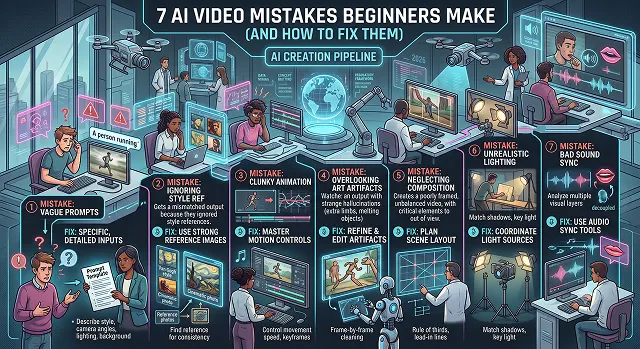
There has been rapid development of the technology used to make videos with the help of artificial intelligence. Marketers, video producers, and content makers nowadays make a lot of use of AI video technology to carry out their task. However, for many people, the switch from regular videos to AI-generated ones is difficult. The majority of rookie users often become overwhelmed by problems such as awkward movements of characters, weird visual errors, bad lighting, and script sounds like it's produced by some robot.
If your video results look unnatural, strange, and too polished, you are probably facing some of the most popular mistakes.
This is the guide that describes 7 most common mistakes in AI video making and how to overcome them.
1. Writing Vague, Single-Sentence Prompts
The Mistake
Most beginners enter generic, simple text prompts like:
- ❌ "A cinematic video of a warrior in a futuristic city."
This gives the AI's text encoder too much freedom to guess key scene details. The result is usually inconsistent lighting, drifting camera angles, blurred background details, and unnatural character shapes.
The Fix: Use the 5-Element Prompt Formula
To generate clean, production-ready video clips on your first try, structure your text prompts using the industry-standard Five-Element Recipe:
- Prompt = Subject + Environment + Action + Cinematography + Lighting Style
- Pro-Level Example: ✅ "Close up tracking shot of a tired female cybernetic warrior in battered metallic armour slowly walks into a neon lit Tokyo wet street, rain, Tokyo, 35mm anamorphic lens, low key volumetric lighting, soft dust particles, cinematic teal and orange colour grade."
2. Ignoring Camera Motion Vector Instructions
The Mistake
- Beginners often focus entirely on describing what is in the scene while completely forgetting to direct how the camera moves.
- When an AI video engine isn't given camera instructions, it often defaults to random, chaotic zooming or flat, lifeless static frames.
- [Vague Camera Instructions] ➔ [Random AI Movement] ➔ [Background Distortion & Warping]
The Fix: Use Precise Cinematography Terms
DiT Model Guidance · Specific Camera Directive Terms
| Target Motion | Exact Prompt Terms to Add |
|---|---|
| Smooth Forward Tracking | "Slow camera dolly forward along the negative Z-axis, steady push-in." |
| Revealing Environments | "Wide-angle slow drone crane shot ascending vertically, revealing the landscape." |
| Dynamic Character Focus | "Low-angle orbit tracking shot around the subject, maintaining 3D parallax." |
| Cinematic Depth | "Macro shallow depth of field, rack focus from foreground leaves to background subject." |
3. Demanding Too Much Action in a Single Clip
The Mistake
Attempting to compress a full action sequence into just 5 seconds of an instruction.
- ❌ "A man stands up from his chair, walks across the floor to the door, opens the door, runs down the stairs to his car, and drives away."
Forcing an AI model to calculate various dynamic movements in a single generation step often leads to multiple instances of geometric errors like limping limbs, having extra hands, etc.
The Fix: Animate Micro-Movements & Use Multi-Shot Scripts
Keep your individual generation prompts focused on a single, specific movement. Break complex scenes down into short, multi-shot sequences:
1. Establish the Scene & Subject Action
- Prompt a single close-up action: "A man standing up quickly from a wooden chair, turning his head toward a door, tense facial expression."
2. Switch to the Environmental Reveal
- Generate a separate medium shot: "A wooden door swinging open rapidly into a dark corridor, dramatic volumetric light streaming through."
3. Execute the Action Conclusion
- Cut to a tracking shot: "Low-angle tracking shot of leather boots running down a staircase, motion blur, fast camera movement."
7 AI Video Mistakes & Solutions Master Matrix
Troubleshooting Framework · Operational Optimization & Defect Fixes
| Mistake | Core Technical Cause | Exact Operational Fix | Expected Result |
|---|---|---|---|
| 1. Vague Single-Sentence Prompts | Unconstrained latent diffusion allows tensor layers to guess composition. | Apply the 5-Element Formula: Subject + Environment + Action + Cinematography + Lighting. | Eliminates floating textures, morphing faces, and random lighting shifts. |
| 2. Ignoring Camera Motion Vectors | Omitting motion directives defaults the model to chaotic panning or static frames. | Use precise cinematography terms: "negative Z-axis dolly," "slow ascending drone crane," "3D parallax orbit." | Delivers intentional, smooth, artifact-free camera movement. |
| 3. Demanding Too Much Action Per Clip | Pushing multiple temporal actions into one 5-second pass causes geometry melting. | Animate single micro-movements per prompt; build scenes using 3-to-4-second multi-shot cuts. | Maintains realistic human anatomy, continuity, and scene physics. |
| 4. Skipping Negative Prompts | Lack of exclusion parameters permits training artifacts and sudden cuts to bleed through. | Paste a defensive negative block: "deformed anatomy, floating limbs, digital artifacts, sudden camera cuts." | Filters out typical generation flaws and visual glitches automatically. |
| 5. Over-Sharpening & Halo Artifacts | Aggressive upscaling math over-corrects edge contrast, clipping pixels to pure white. | Run a 1× de-blocking pre-pass first; keep Sharpening under 15–20% and increase Dehalo parameters. | Produces clean, organic 4K edges without white halos or waxy skin textures. |
| 6. Monotone AI Voice Narrations | Default TTS settings output rigid, averaged pitch predictors without natural pauses. | Lower voice Stability to 40–45%, add ellipses (...) for breathing pauses, and layer background audio at -22dB. | Creates natural, human-sounding speech with expressive cadence and depth. |
| 7. Not Reviewing The Seed Before Wasting Credits | Re-rendering the full clip after every small prompt tweak burns through generation credits fast. | Lock the seed and preview at low resolution first; only run a full-quality render once the composition looks right. | Saves credits and cuts down on repeated full-length re-renders. |
Request A Custom AI Video
Tell us what you're trying to create and we'll point you to the right tool — or help you set it up.
4. Skipping Negative Prompts and Defensive Filters
The Mistake
- When you concentrate completely on what you wish to capture in the image, you often miss specifying the avoided aspects while applying the system.
- When negative restraining prompts are not present, AI video systems invariably generate extraneous digital artifacts, unnatural skins, or abrupt and uncomfortable cuts.
The Fix: Copy-Paste a Defensive Negative Prompt Block
Always copy and paste a dedicated defensive prompt string into your workspace's Negative Prompt field before rendering:
- Universal Negative Prompt String: "deformed anatomy, floating limbs, extra fingers, warped faces, digital artifacts, sudden camera cuts, flashing lights, blurry geometry, low resolution text, split screen framing, over-processed CG texture."
5. Over-sharpening can lead to the creation of white halo artifacts during the upscaling process
The Mistake
- This involves taking a low-quality AI video image (like 720p) and simply putting it through an upscaling tool with maximum sharpness.
- This leads to serious artifacts on the edges, like harsh outlines appearing around the objects, unnatural waxy appearance of the skin, or disturbing flickering of lines on the screen while the camera is on the go.
- [Low-Res Video] ➔ [Over-Aggressive Sharpening] ➔ [White Halos & Waxy Skin]
The Fix: Use a 1× Cleanup Pre-Pass Before Scaling
Never jump straight to high-strength 4K sharpening. Apply this two-step restoration process:
- Run a 1× Resolution Cleanup Pass: First, perform a one-time processing at the original resolution. Use a special deblocking equipment (like Topaz Nyx or Iris) for your first processing.
- Manual Slider Calibration: During your next round of upscaling to 4K, know that the sharpening levels should be set to less than 15 to 20, the noise reduction parameter should be no more than 40 to 50, and make the de-haloing increased in order to keep natural edges of the objects.
6. Using Unedited, Monotone AI Script Narrations
The Mistake
- Copying and pasting an unaltered script into any default TTS system without changing the speed, tone, and rhythm will not yield good results.
- Using a totally flat and computerized voice will bore your audience and ensure that they abandon your video.
The Fix: Adjust Voice Settings and Employ Natural Punctuation Techniques
Regardless of using programs such as ElevenLabs or public domain speech generators, modify your audio settings to create a natural rhythm:
- Reduce Stability Slider settings to 40%-45%: When you lower the stability, it will impart natural pitch fluctuation, feeling, and slight variations in tone.
- Install Punctuation Pacing: Use ellipses or a long dash in a text script to mandate the AI voice to breathe appropriately, just like a human natural voice.
- Overlay Background Music: Always add light background music at -18dB to -22dB under the voice track and sound effects at video transitions.
AI Video Mistake Fixes
Master advanced troubleshooting for artifact reduction, resolution scaling, and workflow stabilization.
Melted geometry is the #1 beginner artifact. It happens when you dump an unorganized paragraph into a generator, causing the AI to scramble conflicting concepts. Fix this by deploying the Subject-Setting-Motion-Aesthetic formula. Separate your descriptive variables clearly (e.g., *Subject: Cyberpunk Woman* | *Action: Walking Toward Camera* | *Aesthetic: Cinematic 35mm*). If using an engine like Wan 2.1, explicitly use their structured prompt recipe to force stable physics.
Generic prompts like "photorealistic skin" ironically confuse diffusion models into generating over-smoothed, waxy faces. To fix this waxy artifact, insert explicit tactile texture descriptors. Utilize prompts like: "Natural human skin pore detail, subtle fine micro-expressions, detailed fine hairs, film grain texture, raw analog video aesthetic, natural subsurface light scattering." This forces the AI to compute real texture gradients instead of smoothing pixels.
Visual drift is massive beginner mistake. If you rely on text-to-video only, the model randomizes the face every single run. You must deploy an Image-to-Video baseline workflow. Generate a high-resolution Midjourney portrait or character turnaround sheet first. Pass *that exact image* into Kling or Luma as your base reference. Lock the character details in the description, and only prompt for movement changes (e.g., "subject looks down and blinks gently").
This spatial tearing happens when you set the "Motion Intensity / Strength" slider to maximum velocity. Forcing extreme speed requires the neural engine to take massive structural risks, which frequently tears objects apart. To solve this, dampen your motion intensity slider to roughly 3 to 5 out of 10. Lower velocities establish a stable temporal path, resulting in smooth parallax effects rather than structural stretching.
If background layout lines "swim" or "buzz," your upscaling and generation pipelines are conflicting. Beginners often upscale *before* the temporal pass is complete. For a clean, stable scene, utilize a model architecture that cross-references neighboring frames (like Wan 2.1 or specialized temporal models in Topaz). Ensure your background texture details are simplified in the prompt, focusing descriptive weight on the main motion trajectory.
Unmanaged AI voices kill retention. Robotic tones happen when you provide only flat, "clinical" script text. To fix this, open your script workspace sheet and inject explicit SSML, Punctuation cues, and Emotion Tags. Add tags like *(excited)*, *(whisper)*, or break indicators. Crucially, adjust the vocal stability slider downward to roughly 50-60% to allow natural human pitch variance and unique breath break dynamics.
Beginners mistakenly render into heavily compressed MP4 layouts, baking generation noise permanently into the final master. Follow this strict 3-Step Mastering Routine: First, review low-resolution draft renders for artifact safety. Second, apply heavy automated auto-reframing for social formats. Finally, run the *cleanest* base clip through an anime/CG-optimized upscaler (like Topaz Video AI's Iris engine), and always compile the final master using uncompressed, edit-ready codecs like Apple ProRes 422 HQ.
Ready to try AI Videos?
Transform your ideas into cinematic video in seconds.